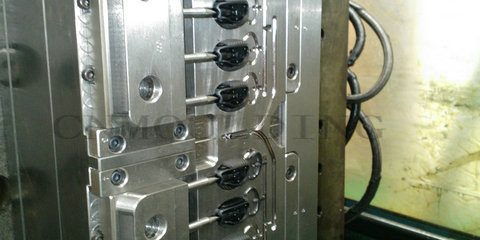
In high-precision injection molding—specifically for automotive, medical, and aerospace components—supplier selection must be based on verifiable engineering metrics rather than commercial capacity. This guide outlines the technical benchmarks for qualifying a mold manufacturer.
1. Dimensional Control and Process Capability (CPK)
A qualified manufacturer must demonstrate the ability to maintain critical dimensions within tight tolerance bands across multi-cavity tools.
Precision Benchmark: For high-precision tools, the supplier should achieve a CPK ≥ 1.67 for critical-to-quality (CTQ) dimensions.
Tolerance Standards: Evaluation should focus on the manufacturer’s ability to consistently hit ±0.01mm to ±0.02mm on core/cavity inserts.
Verification: Request CMM (Coordinate Measuring Machine) full-dimensional reports from recent T1 trials to verify steel-safe conditions and shrinkage compensation accuracy.
2. Steel Grade and Heat Treatment Validation
Tool longevity is a direct function of metallurgy and thermal processing.
Steel Selection: For production volumes exceeding 500,000 cycles (Class 101 molds), the manufacturer should utilize through-hardened steels such as AISI H13, S136 (ESR), or 1.2344.
Hardness Specifications: Standard cavity/core hardness should be validated at 48–52 HRC for H13 and 50–54 HRC for S136.
Certification: High-tier suppliers must provide Steel Heat Treatment Charts and Material Mill Certificates to ensure no substitution of low-grade local equivalents which lead to premature stress cracking or gate erosion.
The transition from Design to Manufacturing (DFM) must be backed by simulation data, not intuition.
Moldflow Analysis: Suppliers must provide comprehensive Moldflow Simulation Reports, including:
Fill Time & Pressure: Predicting injection pressure required vs. machine tonnage (ideally < 80% of max pressure).
Cooling Circuit Efficiency: Delta-T across the mold surface should be within ±2°C to prevent differential shrinkage and warping.
Air Trap & Gate Location: Verification of shear rates at the gate to avoid material degradation.
Scientific Molding Protocol: During T1/T2 trials, the engineer should perform a Viscosity Curve, Cavity Balance Study, and Pressure Drop Study to establish a robust processing window.
4. Case Study: Cycle Time Optimization & Tolerance Stability
Project: Medical Housing (Material: PC/ABS Blend, 4-Cavity Tool)
The Technical Challenge: Reducing cycle time by 15% while maintaining a critical alignment tolerance of ±0.015mm.
Engineering Execution:
Implemented Conformal Cooling inserts (3D printed Maraging Steel) to resolve heat accumulation in deep ribs.
Optimized gate geometry using a Rheological Study, reducing injection pressure by 12MPa.
Achieved a stable cycle time reduction from 24.5s to 20.8s.
Data Result: Post-optimization CMM data showed a standard deviation of σ = 0.003, resulting in a zero-defect rate over 100,000 shots.
5. Machining Infrastructure & Precision Metrics
The floor shop’s technical capability is defined by its equipment’s positional accuracy.
CNC Milling: High-speed CNC (20,000+ RPM) with a positioning accuracy of ±0.003mm.
EDM (Electrical Discharge Machining): Look for mirror-finish EDM capabilities where the surface roughness (Ra) can reach 0.1μm, reducing the need for manual polishing that can distort geometry.
In-House Maintenance: A technical partner must have a documented Preventive Maintenance (PM) Program for customer assets, tracking shot counts and scheduling cleaning/lubrication of slides and lifters.
Summary for Technical Procurement
When auditing a facility in industrial hubs like Shanghai, focus on the Engineering-to-Toolmaker ratio and the presence of a dedicated Metrology Lab. A manufacturer’s value is found in their ability to translate complex polymer rheology into stable, repeatable steel geometry.
flame-retardant plastic materials in new energy automobile parts
Metal inserts are widely used in new energy vehicle (NEV) components where mechanical fastening, electrical insulation, structural reinforcement, or dimensional stability is required. Typical applications include battery pack components, busbar assemblies, structural brackets, threaded inserts, and other metal-plastic components.
Metal insert molding combines a metal insert with an engineering plastic in a single injection molding process. This can reduce assembly operations and improve component integration, but it also introduces several manufacturing challenges.
The main risks are related to insert positioning, metal-plastic thermal stress, insert retention, and mold design. These issues need to be considered during the part design and DFM stage rather than being addressed only after mold fabrication.
During the filling and packing stages of injection molding, the flow of molten plastic can generate significant forces around the metal insert. If the insert is not adequately supported, it may move, rotate, or tilt inside the cavity.
Even a small positional deviation can affect thread alignment, assembly dimensions, wall thickness, or the relationship between the insert and surrounding plastic features. In some cases, an incorrectly positioned insert can also interfere with mold components and increase the risk of tooling damage.
How We Address It
Insert positioning is considered as part of the mold design from the beginning.
Depending on the insert geometry and production requirements, we may use:
Precision insert locating pockets
Mechanical locating pins and supports
Dedicated core features around the insert
Appropriate clearance and shut-off design
Automated insert loading for high-volume production
Vision-based positioning where tighter positioning control is required
The objective is not simply to hold the insert in place, but to establish a repeatable positioning method that remains stable throughout the molding cycle.
For high-volume automotive programs, the insert loading process can also be reviewed together with the mold design to improve cycle consistency and reduce operator-dependent variation.
2. Thermal Stress Between Metal and Plastic
Metal and engineering plastics have different thermal expansion and shrinkage characteristics. During injection molding, the polymer melt enters the cavity at a much higher temperature than the metal insert. As the part cools, the plastic and metal respond differently to the temperature change.
This difference can create residual stress around the insert.
If the stress is concentrated by sharp corners, thin plastic sections, or an unsuitable insert geometry, it may contribute to cracking, deformation, or reduced interface performance during subsequent thermal cycling.
For NEV applications, these effects can become particularly important when components are exposed to repeated temperature changes or require tight dimensional control.
How We Address It
Thermal behavior is considered during both material selection and mold development.
Depending on the resin, insert geometry, and required performance, the process may include:
Appropriate insert preheating
Controlled mold temperature
Optimized filling and packing conditions
Controlled cooling
Suitable plastic wall thickness around the insert
Stress-relief features in the part design
Evaluation of glass-fiber orientation and molding shrinkage
Insert preheating is not treated as a fixed process parameter. The appropriate temperature and process window depend on the resin, metal insert, component geometry, and performance requirements.
For demanding applications, molding trials and thermal cycling tests can be used to verify the design rather than relying only on theoretical calculations.
3. Insert Retention and the Metal-Plastic Interface
A smooth metal surface does not automatically provide sufficient mechanical retention after injection molding. Depending on the application, the insert may be exposed to pull-out forces, torque, vibration, thermal cycling, or repeated assembly loads.
For this reason, the interface between the metal insert and plastic should be considered during the early design stage.
How We Address It
Where appropriate, the metal insert can be designed with mechanical retention features such as:
Knurling
Circumferential grooves
Undercuts
Slots or other retention features
These features allow the plastic to mechanically lock around the insert and can improve pull-out and torque resistance.
The mold design must also provide sufficient support and appropriate plastic flow around the insert. Gate location, venting, packing conditions, cooling, and local wall thickness can all affect the final interface quality.
For applications that require sealing or leak-tight performance, the sealing function should be treated as a specific design and validation requirement rather than assumed from mechanical interlocking alone.
Material Selection for NEV Insert Molding
The plastic material should be selected according to the actual electrical, thermal, mechanical, dimensional, and flame-retardant requirements of the component.
Depending on the application, engineering plastics such as PBT, PPS, PA, and their reinforced or flame-retardant grades may be considered.
For example, glass-fiber-reinforced materials can provide improved stiffness and dimensional stability, but the glass-fiber content and flow direction can also affect:
Molding shrinkage
Warpage
Fiber orientation
Local mechanical properties
Dimensional accuracy around the insert
Residual stress
Therefore, material selection should not be based on flame retardancy alone.
The resin grade, reinforcement level, processing requirements, insert material, part geometry, and final application conditions all need to be considered together.
What We Review During Insert Molding DFM
A reliable insert molding process starts before the injection mold is built.
During the DFM stage, we review the relationship between the metal insert, plastic component, and mold structure.
Insert Design
We review:
Insert dimensions and tolerances
Knurling, grooves, or undercuts
Required pull-out and torque performance
Insert loading direction
Potential interference with mold components
Plastic Part Design
We evaluate:
Wall thickness around the insert
Ribs and bosses
Stress concentration areas
Draft angles
Shrinkage and warpage risks
Plastic flow around the insert
Mold Design
The mold design may include:
Insert locating and supporting structures
Core and cavity clearances
Gate location
Venting
Cooling layout
Hot runner or cold runner configuration
Mold protection considerations
Injection Process
The molding process is then developed around the actual material and component requirements, including:
Insert temperature
Mold temperature
Filling conditions
Packing pressure and time
Cooling conditions
Part ejection
Dimensional control
This integrated approach helps identify potential problems before they become tooling or production problems.
From Insert Design to Stable Mass Production
Insert molding is not simply a matter of placing a metal component into an injection mold. The insert, plastic material, part geometry, mold structure, and molding process all influence the final result.
For NEV components, these factors should be considered together from the beginning of the project.
Our engineering team can support customers through the process from insert and part design review to mold development, trial molding, process optimization, and mass production.
The goal is to develop a molding process that is not only capable of producing the first qualified sample, but also remains consistent during long-term production.
Planning an NEV Component with Metal Inserts?
Share your part drawing, material requirements, insert configuration, and production requirements with our engineering team.
We can review the component structure and identify potential risks related to insert positioning, material selection, mold design, thermal stress, and injection molding during the DFM stage.
Polyethylene (PE)—including HDPE, MDPE, and LDPE—is one of the most widely used materials in global manufacturing due to its exceptional flexibility, impact resistance, and cost-effectiveness. However, in high-precision injection molding, PE is far from simple. Its semi-crystalline structure introduces severe processing challenges, most notablyhigh mold shrinkage, dimensional instability, and warpage.
At our facility, we look at PE through the lens of seasoned mold makers and injection molding experts. We don’t just melt plastic; we engineer custom tooling and process parameters that tame PE’s erratic shrinkage, turning a high-risk material into a highly stable, high-performance, and cost-optimized product.
When engineered correctly, PE is the ideal choice for products requiring high chemical resistance, excellent low-temperature toughness, and food-grade safety. Over decades of production, we have optimized tools and molded PE for:
Industrial Logistics & Material Handling: Heavy-duty transport pallets, stackable crates, structural bins, and large storage containers requiring exceptional impact strength.
Consumer & Household Goods: Houseware items, structural components for appliances, and children’s toys requiring non-toxic, highly durable performance.
Automotive & Fluid Handling: Chemical tanks, fluid reservoirs, and durable piping components that must withstand harsh environmental degradation.
2. Key Advantages of Injection-Molded PE Products
When molded under precise processing windows with optimized tooling, finished PE parts deliver irreplaceable structural benefits:
Unmatched Low-Temperature Impact Strength: PE retains its flexibility and toughness even in sub-zero environments where other plastics fracture.
Superb Chemical & Environmental Resistance: It is highly resistant to strong acids, bases, and organic solvents, making it excellent for long-term industrial or outdoor exposure.
Excellent Cost-to-Performance Ratio: PE offers a highly economic raw material cost, which, when combined with high-speed automated molding cycles, drastically lowers per-part costs.
Strict Biocompatibility & Food Safety: Inherent compliance with FDA and international food-contact standards without the need for harmful plasticizers.
3. Critical PE Processing Risks: How Our Experience Protects Your Project
The single biggest headache with PE injection molding is its high and non-uniform shrinkage rate (typically 1.5% to 3.0%). If your molder treats PE like standard ABS or PC, you will end up with warped, out-of-spec parts.
Here is how our engineering team proactively resolves and prevents the most common PE molding defects during the tool design and processing phases:
Challenge 1: Severe Part Warpage and Dimensional Distortion
The Risk: PE contracts dramatically as it cools from a molten state to a crystalline solid. If different areas of the part cool at different rates, internal stresses cause the part to twist, bow, or warp out of tolerance.
Our Tooling Solution: We resolve this at the source by designing highly advanced, conformal cooling channels or strategic multi-zone cooling circuits within the mold. By ensuring perfectly uniform mold temperature distribution across both the core and cavity, we minimize internal stress and lock in exact part dimensions.
Challenge 2: Heavy Sink Marks in Thick-Walled Sections
The Risk: PE parts with thick ribs, bosses, or uneven wall thicknesses suffer from heavy sink marks because the core of thick sections stays hot longer and pulls the solidified skin inward as it shrinks.
Our Processing & Design Solution: First, we conduct a rigorous DFM (Design for Manufacturability) review to help you optimize wall-to-rib ratios (ideally keeping ribs at 40-60% of the main wall thickness). Second, we utilize precision, high-pressure injection molding machines with tailored holding pressure and extended packing profiles to continuously feed material into the cooling cavities, completely packing out sink marks.
Challenge 3: Excessive Flash (Brimbing/Pifang) due to High Flowability
The Risk: PE has a very low melt viscosity when heated, meaning it flows incredibly easily. If a mold has minor parting line wear, or if the clamping force is insufficient, the molten PE will seep into microscopic gaps, resulting in unsightly flash that requires manual trimming.
Our Manufacturing Solution: We build PE production molds with ultra-tight machining tolerances using high-rigidity mold bases to prevent deflection under injection pressure. Furthermore, we optimize the injection speed profile using multi-stage profiling—fast injection to fill the cavity, followed by a controlled deceleration near the end of the stroke—to achieve flawless edge quality without flash.
Partner with a Precision PE Injection Molder
Successfully manufacturing PE components at high volumes requires more than just a standard injection machine; it requires a deep, scientific understanding of polymer crystallization and advanced thermal mold design.
We bring years of hard-earned, practical shop floor experience to your project. By running comprehensive Moldflow simulations before a single piece of steel is cut, we optimize gate locations, predict shrinkage paths, and eliminate potential defects before they can occur.
Don’t gamble your project on trial-and-error manufacturing. Partner with an expert team that delivers right-the-first-time PE tooling and molding solutions.
At CNMOULDING (Shanghai), precision is not a marketing term—it is a measurable standard. With over 25 years of specialized experience in mold manufacturing and plastic injection, we support global OEMs in delivering complex components with critical tolerances as tight as ±0.005mm.
Operating from our Shanghai facility, we integrate high-end Japanese machinery with rigorous scientific molding principles to eliminate variability in high-volume production.
1. Technical Capabilities & Tolerances
Precision molding requires controlling the interaction between steel, heat, and polymer. Our capabilities include:
Tolerance Control: Consistently achieving ±0.005mm to ±0.02mm depending on material shrink rates and part geometry.
Wall Thickness: Specializing in thin-wall molding down to 0.3mm without compromising structural integrity.
Surface Finish: Achieving high-gloss or functional textures using Mirror EDM (Sodick) and technical polishing, critical for optical and medical applications.
Multi-Shot & Overmolding: Precision integration of metal inserts or secondary TPE/TPU layers with zero flash.
2. Advanced Material Expertise
We go beyond standard resins (ABS/PP) to process high-performance engineering polymers that require precise thermal management:
PEEK & PPS: High-temperature materials requiring mold temperatures up to 180°C to ensure 100% crystallinity.
LCP (Liquid Crystal Polymer): Expertise in preventing flash in ultra-thin connectors through precise venting and 0.002mm-level steel fit.
PC & PMMA: Optical grade clarity maintained through cleanroom-standard production and specialized screw geometries to prevent shear stress.
Glass-Filled Resins (PA66+GF, PBT+GF): Managing fiber orientation to minimize warpage and ensure dimensional stability in structural parts.
3. Case Studies: Solving Complex Engineering Challenges
Case A: Medical Micro-Fluidic Connector
The Challenge: A component with a 0.5mm internal channel requiring a ±0.01mm concentricity tolerance to prevent fluid leakage.
Our Solution: We utilized Sodick Mirror EDM to create the core pins, ensuring a surface roughness (Ra) that allowed for easy ejection without distorting the micro-features.
The Result: 100% pass rate in pressure testing across 500,000 units.
Case B: Automotive Sensor Housing (Overmolding)
The Challenge: Overmolding a brass insert with PBT+30%GF. The insert was prone to shifting under injection pressure (300 Bar), causing electrical failure.
Our Solution: Developed a custom hydraulic core-pulling sequence to lock the insert in place during the injection phase. We used Moldflow Analysis to relocate the gate, balancing the pressure on both sides of the insert.
The Result: Zero insert displacement and a leak-proof seal meeting IP67 standards.
4. Production & Quality Infrastructure
Our Shanghai facility is designed for technical transparency:
Machinery: All-electric Fanuc and Sumitomo injection machines. All-electric drives provide 30% higher repeatability than hydraulic systems, ensuring the “Shot-to-Shot” consistency required for precision parts.
Tooling: We build our own molds in-house. This allows our engineers to adjust the Steel Safe dimensions after the first trial (T1) based on real-world shrinkage data.
Metrology: Every precision batch is verified using Hexagon CMM, OGP Optical Measuring Systems, and Keyence Digital Microscopes. We provide full FAIR (First Article Inspection Reports) and CPK data.
5. DFM (Design for Manufacturing) Integration
We don’t just take orders; we optimize your design. Every RFQ at CNMOULDING includes a technical DFM review:
Optimization of Gate Location to hide witness marks and reduce internal stress.
Wall Thickness Analysis to prevent sink marks or “voids” in critical areas.
Draft Angle Recommendations to ensure clean ejection of high-precision textures.
Contact Our Shanghai Engineering Team
Skip the sales talk. Speak directly with a mold engineer about your project’s tolerance requirements and material selection.
CNMOULDING (Shanghai)Precision Mold Making & Injection Molding Since 2001.
Die casting is a highly efficient manufacturing process utilized to produce structurally complex, high-precision metal components. Unlike traditional gravity or sand casting, High-Pressure Die Casting (HPDC) forces molten metal—predominantly aluminum and aluminum alloys—into a precision-engineered steel mold cavity under extreme hydraulic pressure.
Similar in kinematics to plastic injection molding, advanced die casting integrates sophisticated core-pulling mechanics, automated dosing, and high-performance thermal management/cooling systems to handle the extreme thermal loads of molten non-ferrous metals.
Core Engineering Advantages of Aluminum Die Casting
For global OEMs and tier-1 buyers, our precision aluminum die casting and advanced tooling services deliver superior mechanical integrity and manufacturing economics:
1. Superior Dimensional Accuracy & Surface Integrity
Near-Net Shape Manufacturing: HPDC achieves exceptionally tight dimensional tolerances and excellent surface finishes straight out of the tool.
Minimized Secondary Machining: Due to the precision of the mold cavity, parts require minimal to no post-cast machining (such as milling or turning), significantly reducing raw material waste, tooling wear, and labor costs.
High Strength-to-Weight Ratio: The rapid solidification of the molten aluminum against the water-cooled steel tool forms a dense, fine-grained skin layer, yielding components with high tensile strength, hardness, and excellent dimensional stability under load.
2. Advanced Automation & High-Volume Efficiency
Rapid Cycle Times: Our fully automated hot and cold chamber die casting cells ensure high throughput. Depending on component size and cavitation, a single cell can yield thousands of shots per shift.
Extended Tool Life & Insert Strategy: Utilizing premium, hot-work tool steels (such as premium H13 or Dievar) combined with advanced proprietary heat treatment and surface coatings, our die casting tools achieve an operational life spanning hundreds of thousands to over a million cycles.
3. Optimized Economic Value & Hybrid Integration
Maximum Material Utilization: High fluidity and plasticity of aluminum allows for ultra-thin walls and intricate internal geometries, reducing overall part weight (lightweighting) without sacrificing structural rigidity.
Insert & Multi-Component Integration: We specialize in over-molding or inserting alternative metal components (such as steel bushings or threaded studs) directly into the die cast tool during the cycle, eliminating downstream assembly labor and lowering the total bill of materials (BOM).
Industrial Applications & Core Product Portfolio
Thanks to aluminum’s excellent thermal conductivity, low specific gravity, and high machinability, our die-cast components and custom tooling are widely embedded across critical manufacturing sectors:
Chassis & Drivetrain: Lightweight aluminum wheels, suspension brackets, steering gear housings, and structural cross-members engineered to support vehicle lightweighting initiatives.
2. E-Mobility & Electrical Infrastructure
Powertrain Enclosures: Heavy-duty electric motor housings, stator frames, end shields, and inverter enclosures requiring precise thermal dissipation and strict ingress protection (IP sealing).
Power Construction: High-strength electrical connectors, brackets, cable clamps, and power grid structural accessories.
3. Fluid Power & Precision Machinery
Pump & Valve Hardware: High-pressure hydraulic pump housings, pneumatic valve bodies, impeller assemblies, and fuel system components designed to withstand internal pressure and prevent porosity leaks.
Precision Instruments: Dimensionally stable chassis, frames, and internal brackets for optoelectronic devices and measuring equipment.
4. Architectural Hardware & Industrial Louvers
Structural & Decorative Accessories: High-durability structural construction connectors, architectural bracket systems, heavy-duty industrial fencing components, and premium decorative hardware featuring advanced powder-coated or anodized surface finishes.
Our Engineering Edge in Die Cast Tooling Design
The success of a high-pressure die casting run depends entirely on the engineering of the tool. Molten aluminum is highly corrosive to steel at elevated temperatures and prone to shrinkage porosity or gas entrapment if the gate and venting system are poorly engineered.
Advanced Flow & Thermal Simulation: We run comprehensive gating and thermal analysis to optimize material flow, eliminate air traps, and position cooling lines to mitigate shrinkage defects.
Porosity Control: Through precise vacuum-assisted die casting and optimized intensification pressure mapping, we ensure the internal density of the casting meets strict structural and leak-testing requirements.
From initial product review to million-cycle production tooling, we engineered every step to ensure your components launch on time, on budget, and on print.